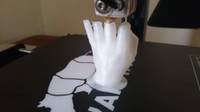
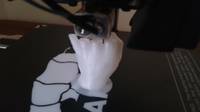
Aw Yeah. It's to get printy!
20/07/17(Thu)13:38


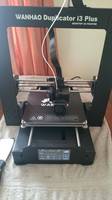
Got myself a 3D printer :D

I've just started the first test print. Finger crossed...

  • Supported file types are: GIF, JPG, PNG
  • Maximum file size allowed is 8000 KB.
  • Images greater than 200x200 pixels will be thumbnailed.
Subject (Optional)
Comment
File (Optional)
Submit

08/08/24(Thu)10:45
532.9
(532.9 Kb, 1000x1000)

I was also recommended the more expensive K1C. Which has an enclosure, more fans, and is easier to deal with (no need for the paper alignment test)

05/08/24(Mon)15:29

That would be a great choice for what you want. Creality have been around since the beginning of the domestic 3D printer boom and have a great reputation. If you do find things you'd like to improve you'll find plenty of options ready to go.

04/08/24(Sun)14:47
728.0
(728.0 Kb, 2500x2500)
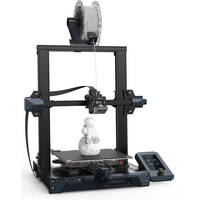
Creality Ender 3 S1

I want to start small with a somewhat simple printer. Mainly to make my own accessories for my racing sim (think button box, mounting systems, etc.), small storage boxes for odds and ends, and various other small stuff in my house. The one I have in mind is this one; https://www.creality.com/products/creality-ender-3-s1-3d-printer as it gets good reviews (not without some downsides oc).

02/08/24(Fri)15:31

I use my 3D printer often when I'm working on projects. Just yesterday I printed a magnetic USB cable holder for a phone stand, so it works like a dock. I also printed some test pieces for my CNC engraving machine I've been working on for 4 fucking years!?! :S

Admittedly I had a lot going on in my life over the last 4 years so it got put to one side, but I'm trying to get it finished and working so I can do engraving and milling of thin wood/plastic/PCB's & maybe aluminium. It's based on a cheap chinese 3018 cnc engraver but with a lot of mods and improvements. Many of those items were made on my 3D printer :)

Don't forget you can always create or get 3D designs and send then to a company to print them for you if you don't think you'll use it a lot.

Also there are 2 types of 3D printer generally used my people like us. The one I have is a filament printer, it's great for larger prints and functional items. The other type is a resin printer, great for smaller things and fine details that you just can't do with a filament printer.

So say you fancied printing detailed figurines you would want a resin printer, but if you wanted to make custom boxes for little electronics projects you'd probably want a filament printer. I do plan on getting a resin printer at some point.

01/08/24(Thu)13:49

Hey, do you still use your 3D printer? Can you recommend it, anything to look out for?

01/05/18(Tue)16:01
37.0
(37.0 Kb, 599x446)
Yoda

Ty, JC :)

Wise words from Donal..uhh Homer
https://www.youtube.com/watch?v=NwVNuyfhF0Q

01/05/18(Tue)15:46
137.3
(137.3 Kb, 660x439)

Yeah, making stuff is hard :D
Just remember these wise words:
"If at first you don't succeed, you we're never meant to try"

01/05/18(Tue)10:02

>>34299>>34300>>34301 That looks like a lot of mind twisting work to get the Pi to work with your needs, sounds awfully a lot like work. Giant pass ;)

On a side not: I put my project 'AI Tank bot' on permanent hold. I don't have enough knowledge (that I'm willing to learn), don't have the tools (that I'm willing to buy), don't want to spend millions on parts (Dad still won't lend me), and a place to put them to use (soldering smells funny). All-in-all too much. VR is fun enough.

30/04/18(Mon)10:52

Damn you been busy, son.

29/04/18(Sun)10:42
480.0
(480.0 Kb, 1024x1520)

The raspberry pi deserved it's own post.

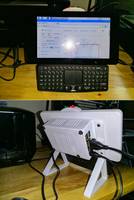
originally I was going to use a Pi ZeroW internally but the processor load was very high and I needed an display to control things locally. I decided to use a Pi 3 and get the official 7" LCD to go with it. I bought a case for the LCD but for some reason all the cases for official LCD mount it upside down and it makes the viewing angle for the display really bad. This lead me to find some models for printing a case which I modified to suit my needs. I modified the legs to allow me to sit a keyboard and on top of the case I added an power button, connected to a OnOffShim to allow for proper power control of the Pi, and a power and action light.

I'm using the OctoPrint software on the Pi to control the printer which allows access from any web browser on my network. I've created a custom plugin to allow me to control the lights, power, webcam etc I added to the printer.

29/04/18(Sun)10:32
625.5
(625.5 Kb, 1024x1868)

A list of recent mods:

Internally added an arduino and some custom made electronics to control printer power, control lighting, monitor temperatures of the room and printer and monitor if filament has run out.

Internally added a USB hub to allow a raspberry pi to control the internal arduino, 3d printer and webcam all from a single usb cable.

Internally added a raspberry pi 5V power supply to power arduino, lighting and external raspberry pi. A custom mains power connector allows for an unmodified power supply to fit inside the printer.

Added a angled front display, see picture, which makes using and reading the display easier. On the right side of the display case is a push button to turn the printer on and off, on the left side are two usb ports, one for powering a raspberry pi and the other for the raspberry pi to control the printer.

Added a filament guide to help filament stay on the spool and avoid it getting tangled. This guide will be updated in the future to have a filament monitor to check if the filament has run out and pause the print if it has.

Added some lights at the top of the printer using USB lights from eBay. By keeping the USB connectors on these led lights I can easily change these lights in the future if I want.

Added connectors on the side of the printer to easily allow connecting lights, sensors and a webcam. The connectors mount is 3D printer and is held in place on the side of the printer with magnets.

mounted an SD card extension on the side of the printer, again with magnets, to allow me to easily update the printers LCD display firmware. Previously you had to dismantle the front of the printer to do this.

Updated the firmware of the Printer and LCD to use custom firmware with better features. https://github.com/Silverquark/i3PlusPlus

Added a webcam. Originally I was going to use a standard raspi camera but in the end I decided to use a logitech webcam as the pi webcam puts more load on the pi's cpu. I used a logitech C270 webcam but I made a custom case so I could add a better mounting system and add leds. I then decided the field of view wasn;t very good so I removed the lens and made a custom lens mount so I could use industry standard M12 lenses. I've used a wide angle lens so I can keep an eye on the whole print area.

27/04/18(Fri)16:38

I considered using a different computer but the software I'm using is made for the Pi, it can be ported but it's a pain in the arse.

I went through that list a while back but it's hard to find any of those models available.
In the end I bought a "made for Pi USB module, the Zero4U, and modified it for my needs. Thankfully it's working perfectly now. The USB problem is because the RasPi can only work properly with certain USB chipsets. The annoying thing is it's not easy knowing what chipset a USB hub has unless you buy it and take it apart!

I still have a few bugs and things to do with my software plugin for the printer software but otherwise it's all working pretty well. I'll upload some photos and info of all the mods over the weekend :D

27/04/18(Fri)08:42

Bugger Pi. At this point you should rebuild it with a proper (more expensive) mobo. That would save those headaches. 99 bugs, fix 1, get 10 more ;)

First build a bigger enclosure so it can fit more stuff. To answer your question; sure but at least check this first:
https://elinux.org/RPi_Powered_USB_Hubs

You could run Ubuntu on the Pi, would that solve anything?
It could also be an issue with the usb ports, maybe lack of power or bandwidth?
Have you tried it with a powered hub?

24/04/18(Tue)16:05

Well I had hoped that stage one of my 3D printer mods would be done by this week and I could start printing cool stuff, but no. Once again the Raspberry Pi has buggered things up. This time it's because apparently there are only 5 USB hubs in the world that work 100% with it :/
I've found one old hub that will work but it's too big to fit in the space I have available :\
2 Other hubs I have that would fit both have problems working with the Pi, but work perfectly with Ubuntu and Windows! :S
I guess I have to buy one of every usb that will fit and hope one will work!?! :C

31/08/17(Thu)14:18

Lots of upgrade happening at once currently so I'll post an update when it's all done. It makes sense to do it this way to avoid having to recalibrate the printer more than once.

25/08/17(Fri)14:53

I'll patiently await the next set of photo updates.

22/08/17(Tue)12:28
50.2
(50.2 Kb, 1000x1000)

Next is a little camera with lights so I can watch the prints remotely and capture time-lapse videos. It's not exactly essential but it'll be a bit of fun:)

I'm also working on a new front to the printer to house the existing LCD panel at an angle so it's easier to see and also will make space to contain the Pi Zero W internally.

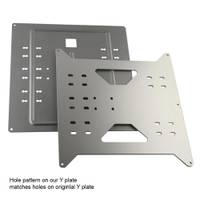
The other main upgrade to make is an upgraded, thicker, Y-carriage plate, the plate that supports the printer bed. The Y-carriage plate on this model is too thin and can bend easily which means you have to check the bed is level all the time. I could just buy a ready made 3mm aluminium one but that would cost £22 and I'm too cheap for that! ;D I've got some 4mm aluminium for £5.50 and I'll machine it to fit :)

The picture shows the original pressed steel plate that is only 1mm thick and a 3mm aluminium plate.

22/08/17(Tue)11:17

Nice indeed! What's next? ;)

21/08/17(Mon)18:01
553.2
(553.2 Kb, 1080x1920)

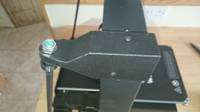
Here is the whole set up of the rear z-brace fully fitted.
Lots of people with these printers do z-braces to the front because making brackets it easier in that direction but the threaded rod gets in the way so I took the time to make better brackets that go to the back and I'm very pleased with the results.

21/08/17(Mon)17:58
415.0
(415.0 Kb, 1920x1080)

Here we have the middle, left, and front, right, feet, unsurprisingly one on each side. These are much simpler than the rear feet as they don't have and other stuff to do.

21/08/17(Mon)17:57
432.7
(432.7 Kb, 1080x1920)

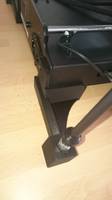
This is the rear foot and z-brace bracket, one on each side. You can see the cover that gets pushed down over the nut once it's tightened up.

21/08/17(Mon)17:55
448.5
(448.5 Kb, 1920x1080)

Ok, here is the part shown here, >>33808, fitted, one on each side. It's the upper Z-brace support to give rigidity to the upper gantry frame. Threaded rod then goes down to a bracket and foot at the back on each side. The threaded rod is covered in shrink wrap tubing to make it look nicer and the nuts are covered with printed covers.

21/08/17(Mon)09:33

I'll post a few shots soon once that particular mod is complete, but essentially it's part of a brace to give the gantry of the printer more rigidity and to give the printer some nice feet.

20/08/17(Sun)22:55

Where you going to place that bracket?

18/08/17(Fri)10:51

>>33806>>33807>>33808 neato!

18/08/17(Fri)10:21
432.1
(432.1 Kb, 1460x1080)

Here's another angle of that same piece.

I'm working on the bracing upgrade now so the printer will have better rigidity which should improve print quality a bit more.

18/08/17(Fri)10:18
475.1
(475.1 Kb, 1879x1080)

You can see the improvement here when printing an overhang, before there was a lot of sagging but now it's all good :)

18/08/17(Fri)10:16
582.0
(582.0 Kb, 1920x1080)

The new fan arrived from China yesterday for my extruder cooler upgrade. It works with the round cooler I printed a couple of weeks ago, >>33775.
Print results are much better :)

04/08/17(Fri)19:58

>>33777 Not enough room to stand my beers in my fridge.
I still have lots of printer mods to make, then I'll move on other things :D

04/08/17(Fri)11:58
183.2
(183.2 Kb, 515x591)

>>33775 hahaha, you're now looking around the house for things to 'improve'?

ps: you do know bottles can stand too?

03/08/17(Thu)15:24
632.3
(632.3 Kb, 1920x1080)

>>33774 Sweet!

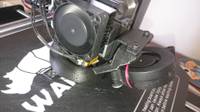
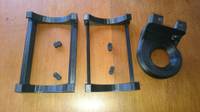
I've printed my extruder cooler (right) in ABS and I'm pretty pleased with it, still waiting on the fan from China.

Left and centre are my beer racks for my fridge. Left is version 1 and right is version 2. The cool thing is these can be fixed together with the little '8' shaped items to make a beer rack as long as required. I can happily report that my beer racks are now in my fridge and working perfectly. No more beer bottles rolling around!

02/08/17(Wed)21:34
61.9
(61.9 Kb, 800x600)

>>33773 oh nice website, ty.

But I've already found a different (easier) way. Plus quiet 140mm fans that still push enough air is finding a 1mm needle in a 1.1mm needle factory. ;)

Still. Thank you for your advice & link. I'll mos def look at the website. Hopefully in the near future I'll come up with something easy & solid that will mos def work. :)

Cheers!

02/08/17(Wed)11:47

>>33769 You can drill or shape the prints like you would any other bit of plastic.
Those fan parts should be possible. They probably want to be made of ABS so they don't have a problem with the heat of the radiator. You'd need to make it as 2 140x140 adapters rather than a single piece because the total size is too big for most 3d printers.

Get designing on tinkercad.com !!
There is a great little tutorial to help you get started.

01/08/17(Tue)17:59

Album with pics.
http://imgur.com/a/Oi2Im

Let me know for further questions.

01/08/17(Tue)17:46
7.9
(7.9 Kb, 650x361)
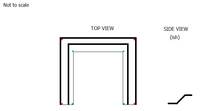
rough idea

>>33769>>33770 Warning, awesome paint skillz, yo!

01/08/17(Tue)17:43
28.0
(28.0 Kb, 425x319)

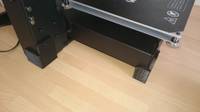
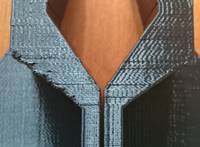
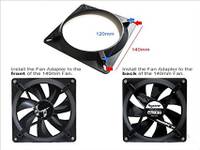
These 120 to 140mm fan brackets work well on a 280 radiator but vice versa not so much.

It could be their round design, so maybe if it was more like a square U-shape?

01/08/17(Tue)17:19

Curious, how strong is your printed stuff? And/or how easy is it to drill a hole in? Or will it crack too easily?

You see, I have this idea for a double U-shaped 120 to 140mm bracket. Because I have a 240 (2x 120mm) radiator but only a 280 (2x 140) radiator bracket and... that shit ain't gonna fly, Morty!
Also the reason for the double U-brackets is that one will be 140x140x..height unknown as of yet.. I still need to do more research on that.

mm..I will get back to you.

01/08/17(Tue)11:22
892.2
(892.2 Kb, 500x243)

>>33767 You know it!

31/07/17(Mon)16:50
495.8
(495.8 Kb, 500x281)
Locked stuff = bullshit, right ^ ?

>>33766 yeah, same as the HP laptop. And here I thought that bullshit wasn't allowed.

That's why I love free stuff #GoT #R&M ;)

31/07/17(Mon)09:14

>>33765 VM was my first stop but I couldn't get my SD card readers to work with it :/
Just one of those situations where lots of little things conspire to be a big pain in the arse :D

The LCD and it's firmware are made by DWIN and probably not intended to be updated outside of the factory, but it still would have been nice to know about the need for linux from the printer manufacturer.

30/07/17(Sun)18:00
651.2
(651.2 Kb, 500x281)
Software?

>>33764 pff.. looks like the manufacturer doesn't know/care about other OS.

Why didn't you just go the Virtual Machine route?

29/07/17(Sat)16:53

I managed to get the LCD working correctly again today! It turns out that there is a problem with preparing the files for the update using a windows computer so you have to use linux to do it. I powered up ubuntu on usb but it had problems and wouldn't work correctly so I then spent much of the day getting ubuntu dual booting on an old laptop. What a pain in the arse! Eventually I managed to get it working and was able to get the LCD of the printer working again.
Pretty annoyed that I only found out about this by searching through forums about the printer and not from the manufacturer.

28/07/17(Fri)15:10
601.3
(601.3 Kb, 1920x1229)

Here is a test print of an extruder cooler for the printer. This design allows for cooling the printed filament more evenly than the standard cooled which only blows air from one side. Better cooling allows for printing longer unsupported sections without it sagging.
This print is with PLA which is easy to use for test prints but won't be able to handle the high temperatures around the extruder nozzle. I've got some ABS filament for doing the final print which will have no problem with the temperature. I'll hopefully get in to that over the weekend, but It'll be a week or two before the new fan for this cooler arrives.

28/07/17(Fri)15:00
523.7
(523.7 Kb, 1920x1080)

Here is the inside of the case. You can see how simple it was to add the button and light mod. For the button to work I added a little script that runs at start up to react to the button being pressed and shutdown the Pi. Very simply but so much more useful.
And yes the button on the case is a custom printed item made with the printer which makes the cost of it all worth every penny! :D

28/07/17(Fri)14:55
491.2
(491.2 Kb, 1080x1920)

>>33760 I'd forgotten about your line of work, makes perfect sense you'd be using one of these :D

So here is the Raspberry Pi Zero W running OctoPrint to work as a network printer server. I don't have the camera yet, but soon I'll be able to watch my prints as they happen, which should help me fall asleep! ;D
I've modded the pi to allow the power light to show through the case so I can see when it's shutdown and safe to switch off. I also added a button in the center of the case to allow me to shutdown the Pi without having to log in through the network.

28/07/17(Fri)14:05

Very cool JC! I often use this same FDM (Fused Deposition Modeling) process to build functional prototypes. Our capacity is 400mm x 400mm x 355mm, and is booked around the clock with people trying to run print jobs. The dual extrude option is nice as you can use a support material to create more complex geometry. Very excited to see the uses you come up with for this.

28/07/17(Fri)08:36

HP, and others like Lenovo, are total fuckers for locking down components in their computers. It's only a tiny change to the firmware on the components but pretty much impossible to fix :(

27/07/17(Thu)22:42

:( How is the display connected to the internal mobo? Maybe you can upgrade with something better.

Different yet similar?
My mums HP laptop has a terrible wifi module. I decided to upgrade it. Flicked some setting in the bios to allow different components. Yay, the BlueTooth 4.2 part works..but the wifi adapter isn't recognized. Not even after firmware/driver update. Seriously?!

So on to the tiny 128GB M.2 ssd, out with that and in with a new 256GB M.2 ..but alas.. it isn't recognized. WTF??
So I checked several M.2 SSD's with an adapter. All, except the HP M.2 SSD, are recognized on my main computer.
Now that's what I call protection.

Fucktards.

27/07/17(Thu)16:03
282.6
(282.6 Kb, 273x200)

So I went to update the firmware on my printer today. It's a slight pain in the arse as you have to update the main board and lcd panel separately. I started with the main board as instructed and all went well. Then following the instructions exactly I updated the LCD which didn't work out so well :/ The screen is now not working correctly. When it starts up the screen is all glitchy and shows bits of the wrong graphics, and the touch screen is totally dead :( I've spent a few hours trying different things but nothing works. I spoke to the manufacturer who says I can send the screen back for replacement with one already updated which is a pain in the arse but at least I can still use the printer and control it via USB (or my Pi Zero W). I just hope he doesn't expect me to send it to China, if that's the case I'll just return the whole thing to amazon for a replacement.
Wouldn't it be nice to just own something that just worked reliably every time! :D

21/07/17(Fri)22:04

>>33752 I think it'll be limited to the local network as my vpn does a great job of blocking external access. But I'll be able to send updates to my phone, or maybe stream it live on youtube or something :D

I've seen up to 4 extruders on a single printer, although often people just add a second one. I've also seen a single extruder which has three filaments going in to it so it mixes the colours. I'll probably take a look at a second extruder at some point, but you can always just print parts in different colours and then fit them together.

Sometime the nozzle can clog but you just heat it up and then clean out the filament with a suitable sized drill bit, but done by hand and not with a drill. It it's really bad you can remove the nozzle and clean or replace it. As far as I can tell normally people just remove the filament after each use so the nozzle will probably still have a tiny bit in it but it'll clear when it next heats up. The main reason to remove the filament after each use is so that it doesn't absorb moisture from the air and then produce bad prints.

If you find something interesting let me know :D

21/07/17(Fri)20:15
211.6
(211.6 Kb, 710x528)

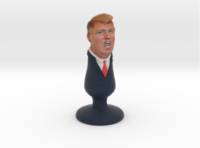
>>33751 haha! Isn't Trump a butt plug in real life?

Remote printing..like, I can print stuff too or just so I can watch too? :D

Btw, would it be possible to mod it so you can add another line of filament? So you can add other colors or type.
Also, I've read that some types of filament are a bitch to clean (they clod-up inside the tube or the print head gets stuck) So must you clean it after every run?

And last question for the day..you take requests?

21/07/17(Fri)15:55
32.5
(32.5 Kb, 680x550)

Just ordered a raspberry pi zero w and a little camera for it so I can setup a wireless print server for the printer using octoprint (octoprint.org). It will allow full control and monitoring of the printer remotely :)
I probably don't really need this add on but it's too cool not to have :P
I've found an firmware update for it too which will be fun to install as you have to update the main motherboard and LCD display separately. The motherboard is easy enough through a usb cable but the display requires taking the front off the printer to access a hidden sd card slot on the back of the display. It's interesting, to me at least, that this printer is basically running on an Arduino Mega 2560, the good thing about that is it's really easy to create custom firmware. An arduino mega isn't powerful enough to run a print server though which is why a Pi is used.

I'll probably be printing some test pieces next and perfecting the art of 3d printing so that soon I can print my very own Jesus buttplug ;D
Then perhaps a Trump buttplug XD

20/07/17(Thu)19:53
6.8
(6.8 Kb, 337x260)
Next: the other hand

>>33748 Sweet. Thanks for the info.
80db is pretty loud, though, I guess you won't print large jobs and take a nap.

Will you now print the other hand?

20/07/17(Thu)19:21

I forgot to mention software.
To print a 3D model you have to use a 'Slicer' to turn a 3D model in to GCode, which is what the printer uses to print each layer. I'm using Cura for this as it came with the printer, it's free thankfully.
To make 3D models lots of people use TinkerCAD, it runs in the browser at tinkercad.com, to make them. It's amazingly simple to learn and use, it even has some great tutorials to get started.
It's also possible to use software like Blender, but it's pretty complex and beyond my needs at this stage.
If you want to search for ready made models, and there are thousands to choose from, them take a look at thingiverse.com.

20/07/17(Thu)15:12
301.7
(301.7 Kb, 1080x1920)

Here is the finished item :)

It's 66mm tall and weights 10 grams (it's hollow), which means it used about 3 metres of filament and cost about £0.17.

I'm sure with practice I can get the printing a little better.

Forgot to mention below that this is printed with PLA, which is a plastic made from maize! It can also print ABS, PETG & PETT and even Nylon with a few mods. It's a very versatile little printer.
The biggest it can print is 200mm x 200mm x 180mm.

20/07/17(Thu)14:57

It's finished printing, but we have to wait for it to cool down now.

This is the one I bought, which should answer most of your questions.
https://www.amazon.co.uk/d/3D-Printing-Scanning/Wanhao-i3Plus-Duplicator-3D-Printer/B01LX8KNV3

It was £360 ready built (you do have to fit 2 big parts together but it's not hard). The most complex bit is levelling the print bed but if you take your time then it's not difficult, it pays to get it perfect and not rush.
This kind of printer is really intended for people how are happy to tinker and improve them over time, which will lead to better results.
I tested the noise and the loudest it got was 80db, so not loud at all really. So with my Hifi putting out 106db I can say I didn't notice any noise from the printer ;D
This test took about 75 minutes. 3D printing isn't fast and big items can take a couple of days!

20/07/17(Thu)14:39

Damn dude! So much envy, give us the specs! What type of plastic does it use? You need special software? Is it quick, and what about noise and heat? Where did you buy it? Did you have to build it yourself?

PS: Only an i3?! Why not i5 or i7 or Ryzen?? ;P

20/07/17(Thu)14:37
372.8
(372.8 Kb, 1920x1080)

90% Done 8D

20/07/17(Thu)14:28
247.8
(247.8 Kb, 1920x1080)

75% Done XD

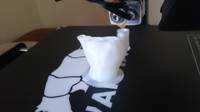
He has fingers!

20/07/17(Thu)14:15
350.8
(350.8 Kb, 1920x1080)

55% Done :D

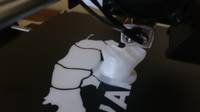
Sorry it's blurry but the whole thing is moving around!

20/07/17(Thu)13:51
239.7
(239.7 Kb, 1920x1080)

25% Done :D

If you're wondering, it's going to be a little hand doing an 'OK' pose. It's the default test model with the printer.

20/07/17(Thu)13:41
379.3
(379.3 Kb, 1920x1080)

13% Done :D